CD, CD Çalar, DVD, DVD Çalar, SACD, LP, Plak Çeşitleri ve Fiyatları
Getting good quality audio from YouTube into your DAW to use in your compositions is surprisingly convoluted. Here are the seven best ways to capture YouTube audio for sampling for both Mac and Windows PCs.
YouTube has changed many things about modern life, from how we watch media to what we sample. Back in the day, if you wanted to capture audio for a song you had to either hold a microphone up to the TV speaker or, if you were really serious, run the audio out from your VCR into your sampler. Thankfully those lo-fi days are past us, with pristine, high-quality audio ready for the sampling on YouTube.
That is, if you can figure out how to get it into your DAW.
There are seemingly endless ways to capture audio from YouTube, from downloading files to real-time audio routing into your DAW. Going about this can be surprisingly complicated, particularly if you have a Mac (Windows users, you win this round). In this piece, we’ll be looking at the seven best ways to capture YouTube audio in order of preference.
Before we get started, we should point out that sampling remains a legal quagmire. Before you use any captured audio, make sure you understand the rights and wrongs of sampling.
4K Video Downloader Plus
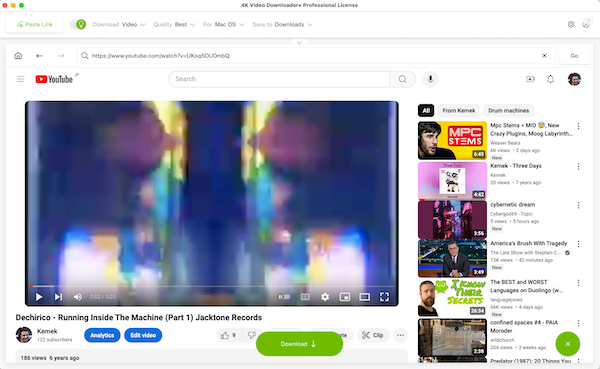
4K Video Downloader, sits top of our list as you can download audio and video and both in super-high quality – up to 8K. If you’re looking to make high-quality social content, it’s a must. And it works on both Mac and Windows which is a huge bonus compared to others in this list.
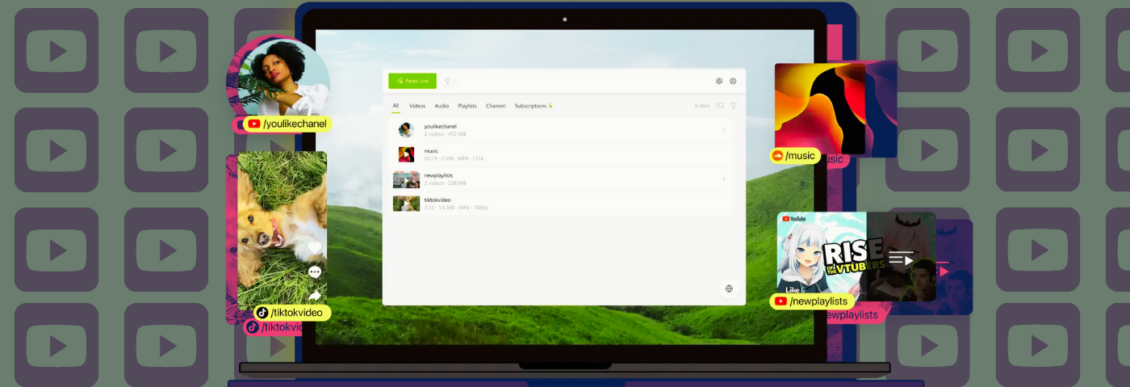
Essentially a browser in an app, it lets you grab video and audio from YouTube, Vimeo, TikTok and other sites easily. Once you choose your settings, hit the Download button. You can download full playlists and channels and even 360-degree videos. For audio, you get m4a, ogg or mp3 files that you can drop into your DAW. This makes it one of the best ways to capture YouTube audio.
Did we mention that 4K Video Downloader is free? It’s free. There are a few different paid versions as well, including a yearly subscription for £18, a Personal license for £24 or a Pro for £56. The main difference between the free and paid is how many videos from a playlist you can get. For most producers, the free version will be fine but if you need a lot of high-quality audio, you may want to look into a paid option.
OBS Studio
OBS (Open Broadcaster Software) is a multi-platform and open source software for video recording and live streaming. It’s a little complex but it is free, and it will let you capture your screen as a .mov video file.
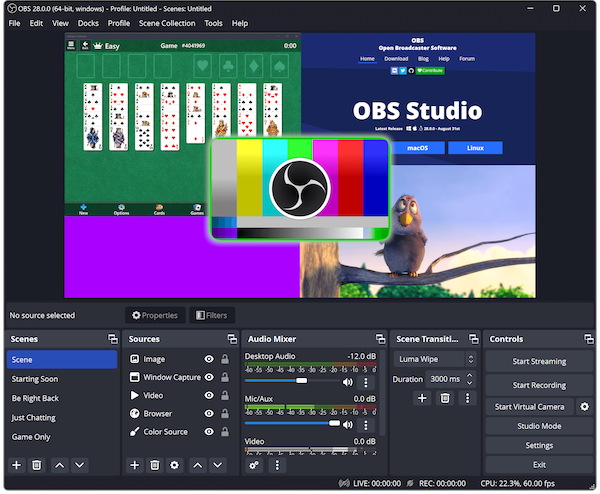
To make a recording, click the plus symbol in the Sources section and choose Display capture for Windows or macOS Screen Capture for Mac. Once you have selected the display that you want to capture, you can adjust the size of the capture window as well as volume of playing audio. Click start recording and play the YouTube video.
Once captured, you’ll need to remove the sound portion from the .mov file and save it as an audio file. You can do this in a number of ways, but we recommend VLC, a freeware media player that can also convert across formats.
This method is a little convoluted but it will get you there eventually without having to route internal audio and for free.
WXAudio WebSampler
In much the same way that 4K Video Downloader Plus puts a web browser in an application, WebSampler from WXAudio puts a web browser in a plugin.
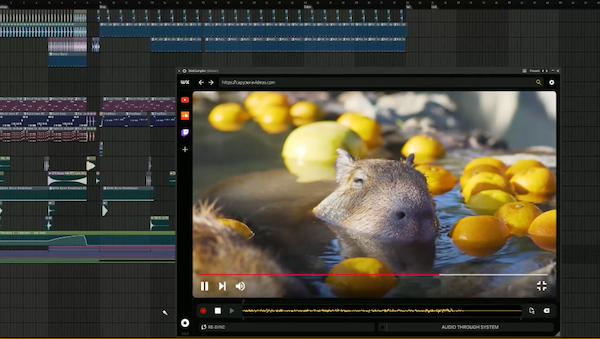
Available as a VST3 or AU plugin or in standalone mode, WebSampler has a transport bar across the bottom to capture WAV audio. Hit play on a YouTube video, click the in-plugin record button, capture the audio and then drag it onto an audio track in your DAW. Conversely, you can also route audio from the plugin to a DAW audio track and capture it that way. WebSampler also has a built-in sample manager.
WebSampler is normally $15 but at the time of publication it was still selling for an intro price of $10. Not bad if you do a lot of work with YouTube audio in your DAW.
The Audacity Team Audacity
Audacity is a long-running free, open source and multi-platform audio editor. It’s been available since the year 2000, with first volunteers and now Muse Group running it. It’s convenient (if a little fugly) and makes a handy tool if you just need to do some quick audio editing. It’s also one of the best ways to capture YouTube audio. That is if you’re a Windows user. (Sorry, Mac friends. You can use Audacity, just not to record system audio without a little extra help. See below for more on that.)
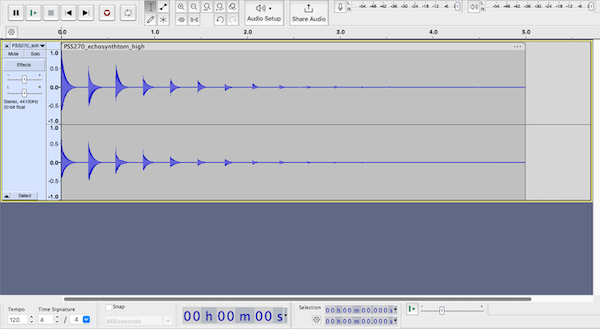
To record audio, open Audacity and change your host to Windows WASAPI in the Audio Setup dropdown menu. Next, change the output device to your primary output device. Start a YouTube video and hit record on Audacity and it will capture the playing audio. Export the file and drop it into your DAW. Voila.
Existential Audio BlackHole
This one is strictly for Mac users. If you have a Mac, you may have noticed that you can’t just record system audio. Mac may make a lot of things easy but internal audio is not one of them. You need a third-party app to route audio from one app to another. Cycling ’74’s Soundflower used to be the method of choice but now that it’s no longer supported, we recommend BlackHole from Existential Audio.

Available in two formats – two-channel and 16-channel – Blackhole is a free “modern macOS virtual audio loopback driver that allows applications to pass audio to other applications with zero additional latency,” in the words of the developer. It works perfectly and is indispensable for Mac owners working with audio, making it one of the best ways to capture YouTube audio.
To use Blackhole to capture YouTube audio, you first need to set up a Multi-Output Device in your Mac. Open the Audio MIDI Setup app located in the Utilities folder under Applications. Click the + symbol in the sidebar and select Multi-Output Device. In the main window, tick BlackHole plus the output device, such as your computer speakers.
Now let’s record computer audio. In sound settings in the menu bar, select the Multi-Output Device. Open QuickTime and choose New Audio Recording from the File drop-down menu. Select BlackHole 2ch in the sources, play the audio and click the record button. Finally, export as Audio Only and you’ll get an m4a file.
Focusrite Control
What we’ve been talking about so far is loopback, internal routing of computer audio. If you’re a Focusrite Scarlett audio interface owner (and given how many of these the company sells, there are very good odds that you are) you may already have software in your computer that can do it: Focusrite Control.
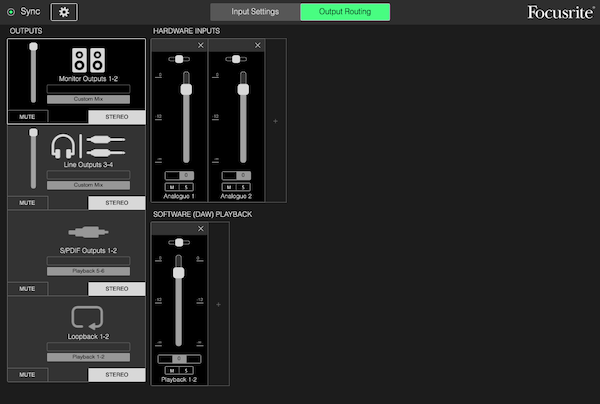
Not every Scarlett unit can do loopback. You’ll have to check yours but it looks like the 3rd gen Scarlett 4i4, 8i6, 18i8 and 18i20, as well as 4th gen models running Focusrite Control 2 all have ways of doing it. Essentially, you commandeer two input channels on the interface to pipe computer system audio into your DAW. With this, you don’t need to worry about recording your screen or downloading anything as the audio gets sent directly into your DAW for capturing.
Setting everything up is a bit of a faff and the specifics depend on your model, so check out Focusrite’s help pages for third-generation and fourth-generation units for more.
Rogue Amoeba Audio Hijack
Rogue Amoeba is a Mac-only software developer that makes programs to get around the fact that Macs have no native internal audio routing. Our favorite is Audio Hijack, a robust app that lets you create and combine multiple routings of internal computer audio and record them.
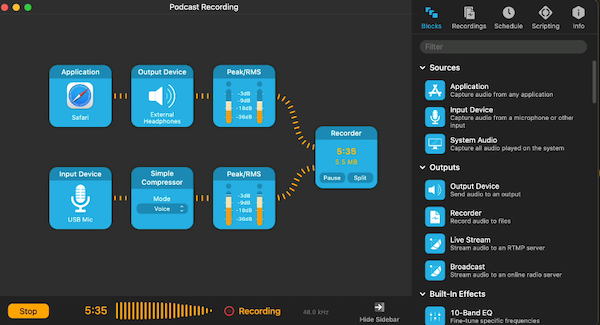
With its modular setup, you can create chains of ‘blocks’. These blocks can be anything, an application, an input device like a microphone, even effects, and then capture the audio. You can also use it for broadcasting audio as a kind of internal audio mixer. It works exceedingly well and sounds great to boot. At $71 it’s not cheap (and updates to new versions aren’t free, unfortunately) but it’s a useful app to have, making it one of the best ways to capture YouTube audio.
[social-links heading=”Follow Attack Magazine” facebook=”https://www.facebook.com/attackmag” twitter=”https://twitter.com/attackmag1″ instagram=”https://www.instagram.com/attackmag/” youtube=”https://www.youtube.com/user/attackmag” soundcloud=”https://soundcloud.com/attackmag” tiktok=”https://www.tiktok.com/@attackmagazine”]
attackmagazine
Getting good quality audio from YouTube into your DAW to use in your compositions is surprisingly convoluted. Here are the seven best ways to capture YouTube audio for sampling for both Mac and Windows PCs.
YouTube has changed many things about modern life, from how we watch media to what we sample. Back in the day, if you wanted to capture audio for a song you had to either hold a microphone up to the TV speaker or, if you were really serious, run the audio out from your VCR into your sampler. Thankfully those lo-fi days are past us, with pristine, high-quality audio ready for the sampling on YouTube.
That is, if you can figure out how to get it into your DAW.
There are seemingly endless ways to capture audio from YouTube, from downloading files to real-time audio routing into your DAW. Going about this can be surprisingly complicated, particularly if you have a Mac (Windows users, you win this round). In this piece, we’ll be looking at the seven best ways to capture YouTube audio in order of preference.
Before we get started, we should point out that sampling remains a legal quagmire. Before you use any captured audio, make sure you understand the rights and wrongs of sampling.
4K Video Downloader Plus
4K Video Downloader, sits top of our list as you can download audio and video and both in super-high quality – up to 8K. If you’re looking to make high-quality social content, it’s a must. And it works on both Mac and Windows which is a huge bonus compared to others in this list.
Essentially a browser in an app, it lets you grab video and audio from YouTube, Vimeo, TikTok and other sites easily. Once you choose your settings, hit the Download button. You can download full playlists and channels and even 360-degree videos. For audio, you get m4a, ogg or mp3 files that you can drop into your DAW. This makes it one of the best ways to capture YouTube audio.
Did we mention that 4K Video Downloader is free? It’s free. There are a few different paid versions as well, including a yearly subscription for £18, a Personal license for £24 or a Pro for £56. The main difference between the free and paid is how many videos from a playlist you can get. For most producers, the free version will be fine but if you need a lot of high-quality audio, you may want to look into a paid option.
OBS Studio
OBS (Open Broadcaster Software) is a multi-platform and open source software for video recording and live streaming. It’s a little complex but it is free, and it will let you capture your screen as a .mov video file.
To make a recording, click the plus symbol in the Sources section and choose Display capture for Windows or macOS Screen Capture for Mac. Once you have selected the display that you want to capture, you can adjust the size of the capture window as well as volume of playing audio. Click start recording and play the YouTube video.
Once captured, you’ll need to remove the sound portion from the .mov file and save it as an audio file. You can do this in a number of ways, but we recommend VLC, a freeware media player that can also convert across formats.
This method is a little convoluted but it will get you there eventually without having to route internal audio and for free.
WXAudio WebSampler
In much the same way that 4K Video Downloader Plus puts a web browser in an application, WebSampler from WXAudio puts a web browser in a plugin.
Available as a VST3 or AU plugin or in standalone mode, WebSampler has a transport bar across the bottom to capture WAV audio. Hit play on a YouTube video, click the in-plugin record button, capture the audio and then drag it onto an audio track in your DAW. Conversely, you can also route audio from the plugin to a DAW audio track and capture it that way. WebSampler also has a built-in sample manager.
WebSampler is normally $15 but at the time of publication it was still selling for an intro price of $10. Not bad if you do a lot of work with YouTube audio in your DAW.
The Audacity Team Audacity
Audacity is a long-running free, open source and multi-platform audio editor. It’s been available since the year 2000, with first volunteers and now Muse Group running it. It’s convenient (if a little fugly) and makes a handy tool if you just need to do some quick audio editing. It’s also one of the best ways to capture YouTube audio. That is if you’re a Windows user. (Sorry, Mac friends. You can use Audacity, just not to record system audio without a little extra help. See below for more on that.)
To record audio, open Audacity and change your host to Windows WASAPI in the Audio Setup dropdown menu. Next, change the output device to your primary output device. Start a YouTube video and hit record on Audacity and it will capture the playing audio. Export the file and drop it into your DAW. Voila.
Existential Audio BlackHole
This one is strictly for Mac users. If you have a Mac, you may have noticed that you can’t just record system audio. Mac may make a lot of things easy but internal audio is not one of them. You need a third-party app to route audio from one app to another. Cycling ’74’s Soundflower used to be the method of choice but now that it’s no longer supported, we recommend BlackHole from Existential Audio.
Available in two formats – two-channel and 16-channel – Blackhole is a free “modern macOS virtual audio loopback driver that allows applications to pass audio to other applications with zero additional latency,” in the words of the developer. It works perfectly and is indispensable for Mac owners working with audio, making it one of the best ways to capture YouTube audio.
To use Blackhole to capture YouTube audio, you first need to set up a Multi-Output Device in your Mac. Open the Audio MIDI Setup app located in the Utilities folder under Applications. Click the + symbol in the sidebar and select Multi-Output Device. In the main window, tick BlackHole plus the output device, such as your computer speakers.
Now let’s record computer audio. In sound settings in the menu bar, select the Multi-Output Device. Open QuickTime and choose New Audio Recording from the File drop-down menu. Select BlackHole 2ch in the sources, play the audio and click the record button. Finally, export as Audio Only and you’ll get an m4a file.
Focusrite Control
What we’ve been talking about so far is loopback, internal routing of computer audio. If you’re a Focusrite Scarlett audio interface owner (and given how many of these the company sells, there are very good odds that you are) you may already have software in your computer that can do it: Focusrite Control.
Not every Scarlett unit can do loopback. You’ll have to check yours but it looks like the 3rd gen Scarlett 4i4, 8i6, 18i8 and 18i20, as well as 4th gen models running Focusrite Control 2 all have ways of doing it. Essentially, you commandeer two input channels on the interface to pipe computer system audio into your DAW. With this, you don’t need to worry about recording your screen or downloading anything as the audio gets sent directly into your DAW for capturing.
Setting everything up is a bit of a faff and the specifics depend on your model, so check out Focusrite’s help pages for third-generation and fourth-generation units for more.
Rogue Amoeba Audio Hijack
Rogue Amoeba is a Mac-only software developer that makes programs to get around the fact that Macs have no native internal audio routing. Our favorite is Audio Hijack, a robust app that lets you create and combine multiple routings of internal computer audio and record them.
With its modular setup, you can create chains of ‘blocks’. These blocks can be anything, an application, an input device like a microphone, even effects, and then capture the audio. You can also use it for broadcasting audio as a kind of internal audio mixer. It works exceedingly well and sounds great to boot. At $71 it’s not cheap (and updates to new versions aren’t free, unfortunately) but it’s a useful app to have, making it one of the best ways to capture YouTube audio.
[social-links heading=”Follow Attack Magazine” facebook=”https://www.facebook.com/attackmag” twitter=”https://twitter.com/attackmag1″ instagram=”https://www.instagram.com/attackmag/” youtube=”https://www.youtube.com/user/attackmag” soundcloud=”https://soundcloud.com/attackmag” tiktok=”https://www.tiktok.com/@attackmagazine”]